To play a video on your device, many social networking platforms and websites require video clips with a range of aspect ratios, to be uploaded and shown. Final Cut Pro allows you to repurpose projects with standard horizontal aspect ratios, such as those for film or television, to create outputs in various shapes and sizes. Discover how to change the aspect ratio in Final Cut Pro along with its best alternative tool.

Part 1. What is the Standard Aspect Ratio of Videos
It is possible to have various reasons for needing to change the aspect ratio of a clip. The video may have been captured in multiple formats, or you may wish to display it on a more prominent display than what is compatible with the aspect ratio you selected during recording. The most common aspect ratio used today is 16:9, which is the typical size for ultra HD widescreen televisions and even most computer monitors. There are 16 units in width and nine units in height in the fullscreen aspect ratio. Once considered uncommon, the 16:9 aspect ratio became the most incredible popular for TVs and computer screens since 2009. It is also the internationally accepted format for digital television, including HDTV, Full HD, and SD TV. Conversely, if the 16:9 ratio is for widescreen monitors, the 9:16 ratio, which is the inverse of the 16:9 ratio, is commonly used for social networking sites that support video stories. The most frequent size in this aspect ratio is 1080×1920 pixels, which corresponds to the vertical screen size of a mobile phone.
Part 2. The Leading Tool in Changing the Aspect Ratio of a Video
How to change the Final Cut Pro aspect ratio? Before we learn the steps on how to change the aspect ratio of Final Cut Pro, we have another alternative solution to change it. Video Converter Ultimate is one of the leading programs professionals use. It is equipped with a toolbox kit which you can change the aspect ratio of your video in no time. Along with that, it has a straightforward interface with powerful features. It means it doesn’t matter if you are an amateur or a pro because you can maximize the tool ideally without difficulty. Not just that, if you are worried that rendering your video after changing the aspect ratio might take a lot of time, in Video Converter Ultimate, that is impossible. Because this tool is empowered with 70X faster conversion technology that will make your editing task convenient and efficient, follow the guide below to change the video’s aspect ratio immediately.
Key Features
- Modify your videos by cropping, rotating, flipping, splitting, and trimming.
- Use as an animated GIF maker, video player, and video compressor.
- Play exported video in a wide range of operating systems.
- Rip videos in different formats such as AVI, MOV, MP4, FLV, MKV, etc.
Free Download
For Windows
Secure Download
Free Download
for macOS
Secure Download
Step 1.Run the tool
First, pull a browser, go to the Video Converter UItimate’s official website, and launch the tool. Conversely, you can hit the download buttons above to install the tool.
Step 2.Unload the video
Upon installing, import the video clip by selecting the Add Files button on the upper right corner of the interface.
Tip: For fast uploading, you can instantly drag and drop the video in the middle of the interface.

Step 3.Get ready to edit
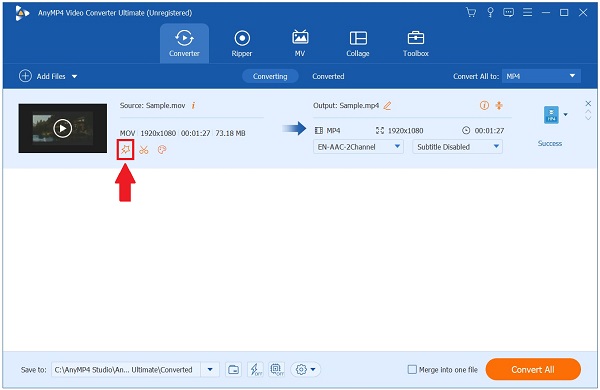
Next, after importing the video successfully in the interface, click the Edit button. Selecting it will lead you to the Rotate and Crop window. This is where you can change the aspect ratio of your video clip.

Step 4.Change the aspect ratio
To change the aspect ratio, locate the Aspect Ratio dialog box and choose the 16:9 as your desired aspect ratio. To save changes, hit the OK button.
Tip: After changing the aspect ratio, you can modify the video by cropping it. To crop the video, use the handlebar on the left screen display and manually adjust it according to your preference.

Step 5.Convert the video clip
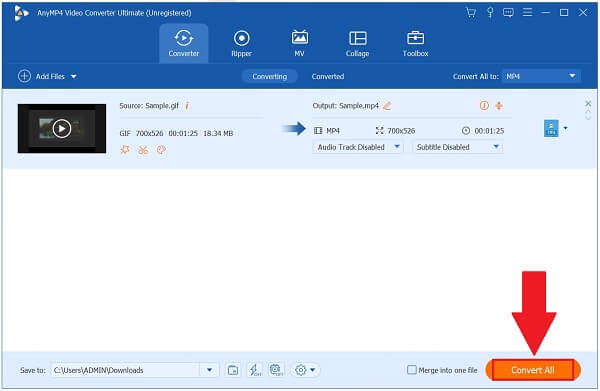
When saving the changes, export the video clip by selecting the Convert All button.

Step 6.Preview the video clip
Finally, after the conversion process, locate the file by clicking the Converted tab near the upper menu bar. Then, click the Folder icon to view your newly changed aspect ratio video.

Part 3. Easiest Way on How to Change Aspect Ratio in Final Cut Pro
Final Cut Pro is one of Apple’s unique video editing programs. It is known as one of the professional-level editors of today. It features more great organizational tools and promotes quick performance. What’s amazingly shocking about this tool is that it caters to professionals and amateurs. Professionals who enjoy the tool’s essential features and beginners who can manage the tool’s many excellent features. One of its primary characteristics, along with its superb functions, is the ability to change the video’s aspect ratio. Yet, one of its disadvantages is that it occupies a lot of storage space on your computer, causing your PC’s performance to be slower than previously unless you have a high-end computer. Nevertheless, it is still worth the try. Below are the simple steps on how Final Cut Pro crops video by changing the aspect ratio.
Step 1.Install the application
To get started, pull a browser and install the Final Cut Pro by going to the main website.
Step 2.Start a new project
Upon installing, click the New Project at the upper-left part of the interface. Then, upload the desired video and drag it to the timeline.
Step 3.Start a new project
To change the aspect ratio, locate the Property window. Click the Modify option to change the aspect ratio that suits your purpose.

Step 4.Change the aspect ratio
Next, the Final Cut Pro aspect ratio can be changed by going to the Custom in the pop-up box and adjusting the resolution numbers to fit the video size. Input values such as 1920 and 1080 to transform the geometry to 16:9. To save changes, hit the OK button.
Note: Before saving the changes, you can rename the file, change the codec and color space.

Step 5.Export the file
Finally, to play the file on your operating system, click the Export button on the upper-right part of the screen and choose your export destination. Now, you can share your video on your most-loved social media sites.
Part 4. FAQs on How to Change Aspect Ratio in Final Cut Pro
-
Is Final Cut Pro available for free?
Yes, you can get a free 90-day trial of the most recent version of Final Cut Pro by downloading it.
-
Yes, you can get a free 90-day trial of the most recent version of Final Cut Pro by downloading it.
If you have prior familiarity with other video editing software, Premiere Pro’s conventional workspace may make it easier to learn and you can crop videos with Premiere. Considering its unique nature, Final Cut can be easily learned if you’re ready to invest some time and energy. Both applications have their advantages and disadvantages.
-
How’s the Final Cut Pro crop video?
To gain access to the Crop controls, perform one of the following actions: Select Crop from the pop-up menu in the viewer’s lower-left corner.
Wrapping up
Changing the aspect ratio of videos in Final Cut Pro and Video Converter Ultimate are easy to learn, and these two tools are highly functional and packed with fantastic features. It is entirely up to you to make your decision, however, I will choose a tool that will make my editing process quick and simple. When it comes to compatibility, speed, and functionality, Video Converter Ultimate is the only tool you’ll ever need to crop your videos. Grab your go-to tool and get it downloaded as soon as possible!


