Jun 25, 2024Posted by Brittany Garcia to Edit Video
Are you interested in learning how to make a video play backward in Premiere Pro? In that case, we are here to show you the effective tutorial you can follow to reverse videos in Premiere Pro. With that, you will be given an idea of how to obtain your final output in just a minute. Aside from that, the article will also provide the advantages and disadvantages of using Premiere. In the last part of the post, we will also introduce another helpful program that can help you reverse your video instantly. So, without anything else, grab the opportunity to read this post.
- Part 1. How to Reverse A Video on Premiere Pro
- Part 2. Pros and Cons of Using Premiere Pro
- Part 3. The Best Alternative to Premiere Pro
- Part 4. FAQs about Reverse A Video with Premiere Pro
Part 1. How to Reverse A Video on Premiere Pro
If you want to know how to make a video play in reverse Premiere Pro, you can get all the ideas from this section. But before that, it is important to learn first about Premiere Pro. Well, Adobe Premiere Pro is among the advanced video editing software accessible on Windows and Mac computers. It can help users in various ways. It includes adding animated matt overlays, auto reframes, 3D video editing, color customization, and more. Plus, it can even provide basic editing tools to use, such as trimming, cutting, cropping, rotating, adding watermarks, and more. With those functionalities, you can tell that Adobe Premiere Pro is an excellent editing software you can access on your computers. In this part, we are going to focus on the process of reversing a video. Thankfully, the software has the Reverse Speed function under the Clip section. With this function, you can reverse a video based on your desired result. Moreover, you can also choose your desired speed for the video. The software can also reverse the audio, along with the video, making it more perfect and convenient. Well, since there are various functions you can use, you can improve your video using the basic editing functions we have mentioned above. However, there are some disadvantages you must learn when using Premiere Pro. Since it is an advanced editing software, it has a difficult learning curve. Its main interface is bombarded with different options and sections. It also consists of various tools that are hard to understand. It is also not totally free. It can only offer a free trial version that is only good for 7 days. But, if you still want to learn how to make a video go in reverse in Premiere Pro, see the steps below.
Step 1. The first thing to do is to download the Adobe Premiere Pro. You can choose what plan you prefer and use its 7-day free trial version. After that, begin installing the software and launch it immediately.
Step 2. After you open the main interface, navigate to the top interface and select the File section. Choose the Open Project to add the video you want to edit. You can also press the Ctrl + O hotkeys for a fast procedure of adding a video.
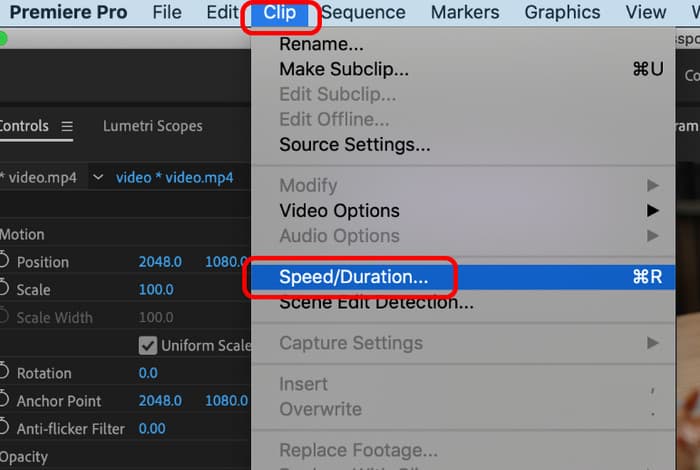
Step 3. Once you are done adding the video, proceed to the Clip section. Then, when various options show up, choose the Speed/Duration function. Another interface will appear on your screen.
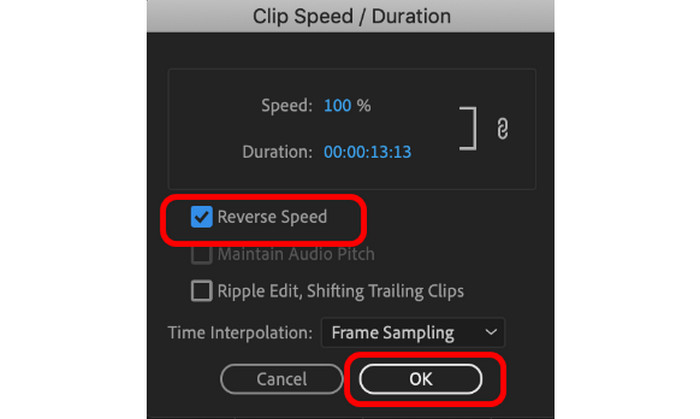
Step 4. Click the checkbox of the Reverse Speed option. You can also adjust the video speed based on your preferred speed. Once done, hit the OK button. After that, you will see that the video will be played in reverse. Now, you’ve learned how to make a reverse video in Premiere Pro.
Part 2. Pros and Cons of Using Premiere Pro
Now, after learning the method to reverse a video, you will learn the pros and cons of the program in this section. To learn all of them, you must check the information below.
Pros
- When reversing a video, the audio will be reversed automatically.
- The video quality won’t be affected after the video-reverse process.
- The program can reverse a video without excess procedure.
- It is accessible on both Windows and Mac operating systems.
- It can offer various editing functions, such as crop, trim, cut, add filters and effects, and more.
Cons
- It has a steep learning curve since there are expensive features that may overwhelm non-professional users.
- The program can only offer a 7-day free trial version after picking the preferred plan.
- It is expensive to purchase.
Part 3. The Best Alternative to Premiere Pro
Since the Premiere Pro is unsuitable for non-professional users, it is better to look for another easier software. In that case, the best Premiere Pro alternative is the Video Converter Ultimate. The program can offer an understandable layout that all users can navigate. After accessing the software, you can already view various functions that may guide you on your task. The program has the Video Reverser feature that you will need to achieve your desired result. The good thing here is that you can reverse the whole video or choose what video part you want to reverse. Also, you don’t have to create an account for accessing the Video Converter Ultimate. What’s more, another advantage of this program is that it is more affordable than Premiere Pro. All you need is to download it and begin the process. Aside from that, there are more features you can enjoy when operating the software. These are the crop, trim, converter, color correction, and more. So, if you want to know how to reverse a video using this best alternative, see the steps below.
Step 1. Hit the Free Download button below to get the Video Converter Ultimate. Once done, launch it and begin the video-reverse process.
Free Download
For Windows
Secure Download
Free Download
for macOS
Secure Download
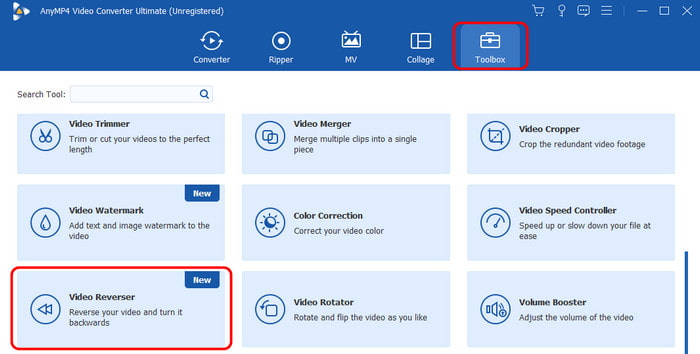
Step 2. Click the Toolbox option from the top interface. After that, select the Video Reverser feature. Then, you will see another mini interface on your computer screen.
Step 3. To add the video you want to reverse, tick the Plus button from the middle interface.
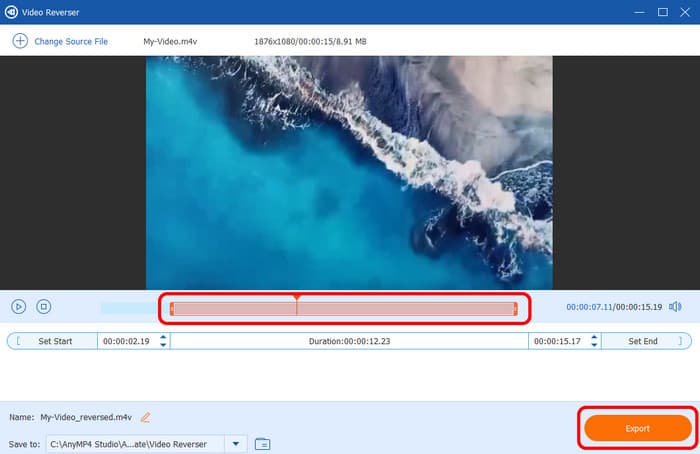
Step 4. Afterward, you can begin reversing the video by adjusting the slider below the video. To save the final video, hit Export right away.
Part 4. FAQs about Reverse A Video with Premiere Pro
-
Why is Premiere Pro shutting down?
There are various reasons why the software is shutting down. It can be software bugs, outdated software, corrupted files, software issues, and more. So, the best way is to troubleshoot and look for a possible solution to solve the problem.
-
Is Premiere Pro beginner friendly?
Based on our own experience when operating Premiere Pro, we can tell that it is unsuitable for beginners. The software has steep learning curves, wherein its extensive features can be overwhelming to them. With that, if you are looking for a beginner-friendly program, it is best to use Video Converter Ultimate for editing videos.
-
Why is Premiere Pro glitchy?
Well, one of the main reasons is maybe your computer is not capable of handling the software. Premiere Pro is a demanding software where it requires a high RAM, a good graphics card, processing power, and more. So, ensure that you have a high-spec computer when using the software.
Wrapping up
You can rely on this post to learn how to reverse a video on Premiere Pro effectively. You will also know the pros and cons of the program to know its capabilities and limitations. Also, if you are a beginner and prefer reversing a video using easy ways, use Video Converter Ultimate. Compared with Premiere Pro, it can offer understandable functions with hassle-free ways to achieve your desired result.
More from Blu-ray Master
- Complete Guides on How to Reverse A Video on CapCut
- Full Guide on How to Create a Slideshow in Premiere Pro
- A Walkthrough Guide on How to Speed Up Videos in Premiere
- Steps on How to Improve Video Quality in Premiere Proe
- Complete Guidelines on How to Stabilize Videos in Premiere
- How to Use the Background Noise Reduction on Premiere Pro