Video editing comes in many forms, as you have to craft your project to perfection. One of the basic methods of editing is trimming, which means cutting or removing the unwanted clips from the video. While many tools offer video trimming, we have to focus on how to trim videos on Windows, as it does not offer a built-in video editor in other OS versions. With that said, read the following recommended tools that might be to your liking.

- Part 1. Trim Videos in the Microsoft Photos App
- Part 2. 4 Best Video Trimming Tools
- Part 3. FAQs about Trimming Videos on Windows
Part 1. Trim Videos in the Microsoft Photos App
In reality, you don’t have to look for other tools to cut and trim videos on Windows. This is because Windows 10 and 11 offer the pre-installed Photos app. Although its main job is to manage and organize all photos and videos within the computer, the Photos app also provides free trimming. But this is what you need to learn: The Photos app is limited to older Windows versions, so it is inaccessible unless you are on Windows 10 or 11. Moreover, the editing tool only has a trimmer and no other features for proper video editing.
• Free and convenient for a quick trimming.
• No extension or plugin is required.
• No major loss of quality.
• Save the trimmed video clip as another copy.
Step 1.Search for the Photos app on your desktop’s search bar. Open the app and choose the video you want to trim on Windows. Locate and click the Edit & Create button from the top-right section. Select the Trim option provided from the dropdown menu.
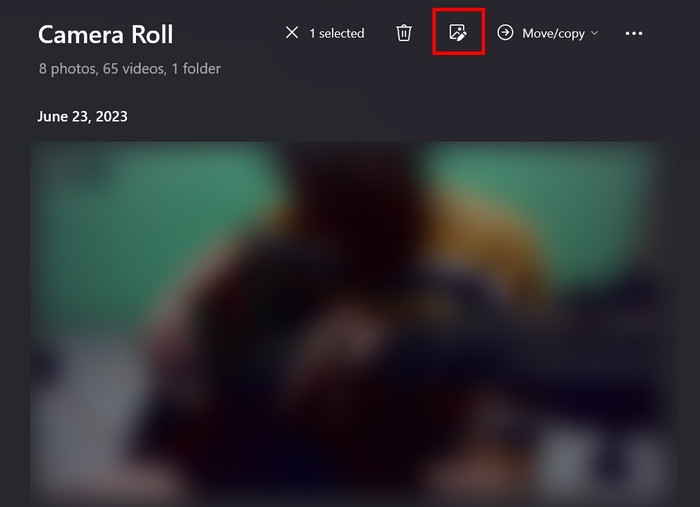
Step 2.The video parameter will be in yellow, with two pins at the ends of the clip. Adjust those pins to choose the parts you want to trim. You can repeatedly adjust the trimmer while playing the video. After that, click the Save as Copy button to apply the trim to the video.
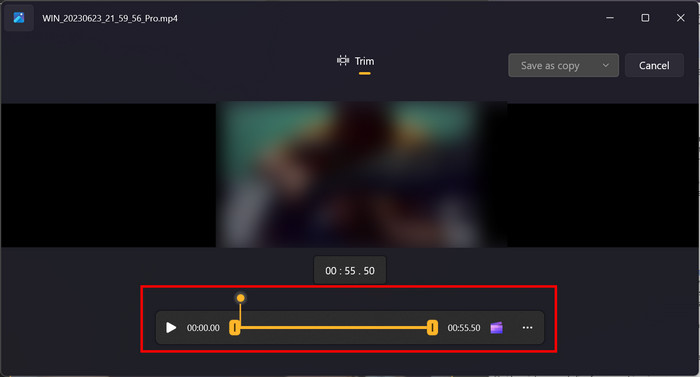
It is easy to learn how to cut videos on Windows with the Photos app. It is a convenient tool, but it does not offer other editing functions. The tool is also not available on any Windows version since it was recently introduced on Windows 10.
Part 2. 4 Best Video Trimming Tools
Video Converter Ultimate
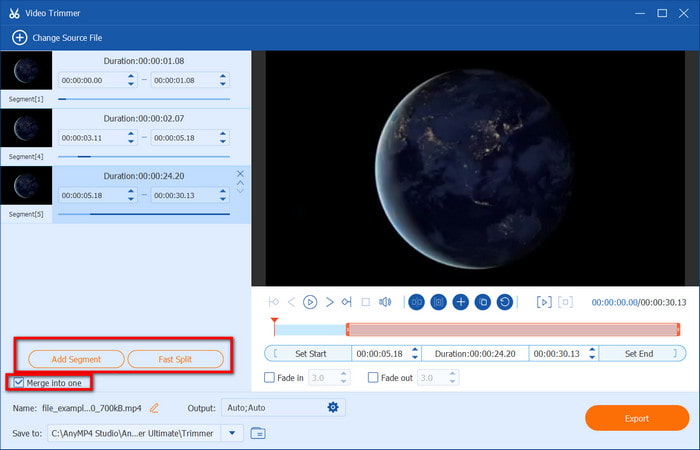
Want to trim videos on Windows with precision? Get Video Converter Ultimate and experience a smooth trimming on your desktop. It includes a straightforward UI where you can cut MP4, WMV, MKV, and other popular formats. The trimmer is also flexible since it allows you to adjust the trimming parameter from the starting to the ending point. What’s more interesting is the Add Segment and Fast Split options that are able to trim clips within the video. Truly, Video Converter Ultimate is the most popular solution for powerful trimming, and also video upscaling, converting, and more.
• Trim videos by adjusting the trimmer and specifying the duration.
• Offer fading in and out transitions.
• Split videos into several clips for proper trimming.
• Allow users to choose the output format, resolution, etc.
Step 1.After downloading and installing Video Converter Ultimate, go to the Toolbox menu. Click on the Video Trimmer option and add the video you want to edit.
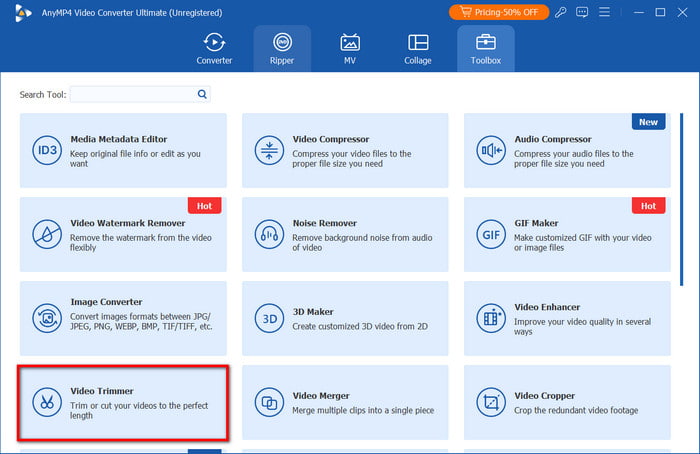
Step 2.The program will initially play the video. You can pause it and adjust the parameter to cut the unwanted parts.
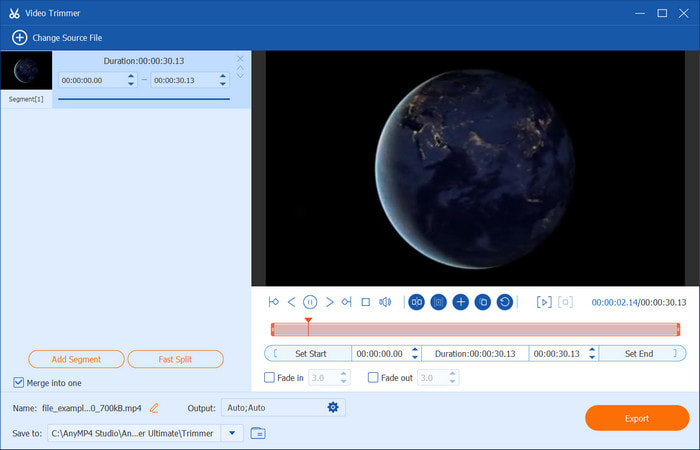
Step 3.Optionally, you use the trimmer to create a segment. Just adjust the parameter on both ends, then click the Add Segment button. With that, you can eliminate the parts between the video and keep the rest. Tick the Merge into One checkbox to merge the created segments.
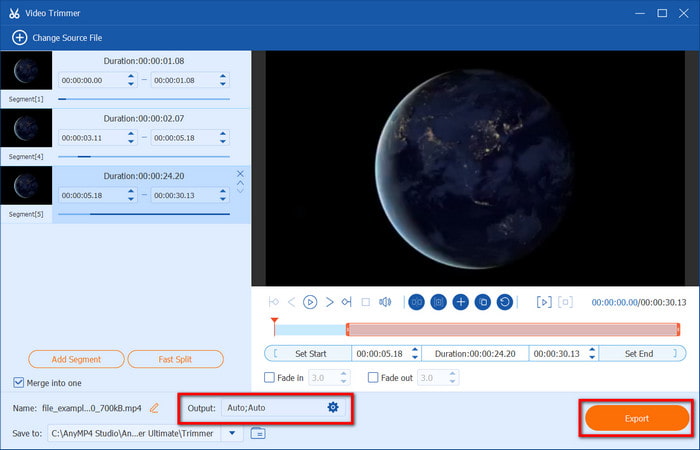
Step 4.The next part will be you choosing the desired output format, resolution, and others. You also need to specify the location folder from the Save To menu. Once done, click the Export button to save the newly trimmed video to Windows.
Video Converter Ultimate focuses on providing you with the best way to trim videos on Windows. With this solution, you will be able not only to properly cut, but also do overall editing in just one tool. Get started today by clicking the Free Download button.
Windows Media Player
WMP is a built-in media player for all Windows OS and does not offer any editing functions. However, it is great to consider since it supports plug-ins like a trimmer, which makes the editing accessible on your media player. However, keep in mind that its purpose is to provide a quick video cut and no other editing options. Here’s how to trim video in Windows Media Player.
• All Windows OS have a media player.
• Plug-ins for video trimming are free.
• Easy to install and activate to WMP.
• A better option for saving storage space and CPU.
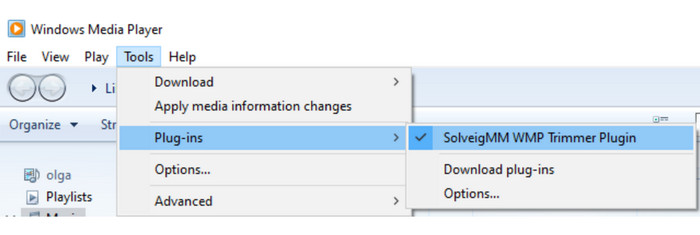
Step 1.Download the SolveigMM WMP Trimmer plug-in. Then install the plug-in to the media player. Navigate to the player’s Tools, then hover to the Plug-ins option. Choose the installed plug-in to activate. Next, upload the video to the media player.
Step 2.Move the blue slider and click the Start button to trim. You will have to specify the starting and ending point of the trimming. If you click the In button, the program will keep the video inside the specified video, while vice versa for the Out button. Rename the file and save it to your desktop.

You have discovered how to shorten a video clip on Windows Media Player. However, it will need the right plug-in to trim the video. It is still convenient, but it can be a bit disappointing since it lacks other important editing features.
VLC Media Player
Unlike WMP, this media player offers more than streaming and playback. VLC has a built-in video trimmer on Windows but with a twist. You will only record the video and its parts that you want to keep, and disregard the other parts. This method is a bit complicated, but we have prepared detailed steps to guide you.
• No extension is needed to install.
• Able to play and trim the video simultaneously.
• Offer other basic editing like converting and compressing.
• Supports most formats like AVI, MOV, FLV, MP4, etc.
Step 1.You can freely download VLC from its official website. Once installed, run the program and upload the video. Then, upload a video and go to the View menu to choose Advanced Controls. You will need to switch from playback to editing controls to trim the video.
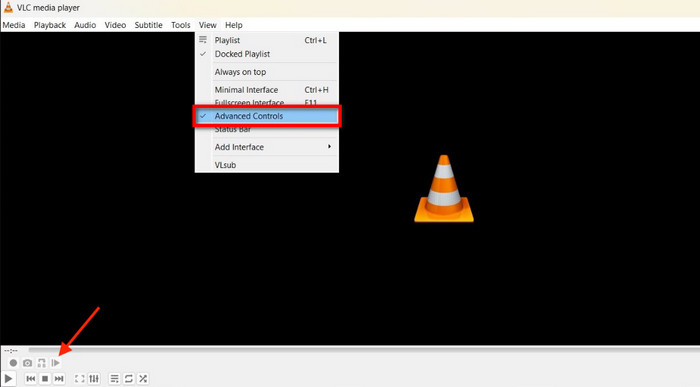
Step 2.Find the desired starting point of the video, then click the Record button from the bottom interface to begin the video trimming. Hit Pause to end the trimming. After, you can preview and export the trimmed video.
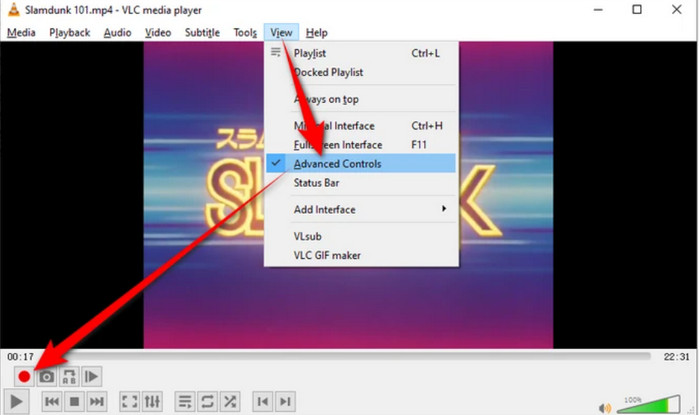
VLC is an all-around media player, and it also works well as a video trimmer for Windows. The only drawback with it is the indirect method of trimming. Unlike a dedicated video editor, you don’t have to record but directly cut the video.
Flexclip
Flexclip helps to eliminate unwanted parts in the video by trimming them effortlessly. But other than this, it is also packed with essentials to help you easily edit the video on your desktop. Trimming also with this alternative is a breeze, but it will auto-apply watermarks except on the premium software version.
• Trim GIF, MP4, MKV, and other formats.
• The trimmer can be adjusted to be shorter or wider.
• Complete editing with video merging and editing.
• Directly share clips to Twitter, Facebook, and other platforms.
Step 1.Open Flexclip and click the Create a Video button. From the Media menu, upload the video clip you want to trim. Make sure to drag and drop the file to the timeline below.
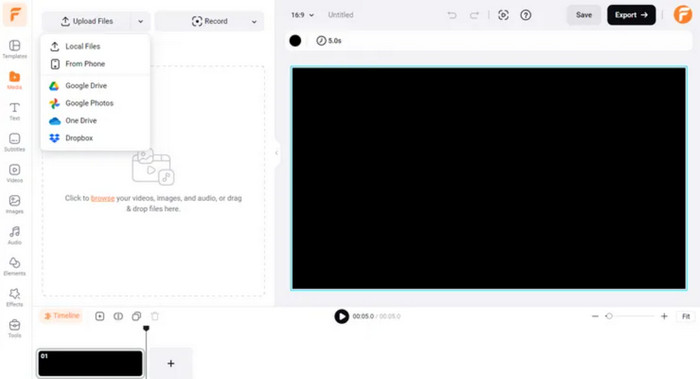
Step 2.Just drag and adjust the slider to trim the video on Windows. Other than that, you can choose to edit the clip with text, new filters, playback speed, and others. Play the video to preview, then export it to a folder.

As you can see, Flexclip manages to trim videos on Windows with just a couple of clicks. It is a great solution only if it does not apply watermarks on the exported clips.
Part 3. FAQs about Trimming Videos on Windows
-
How to trim videos on Windows 10 using Adobe?
Start by installing Adobe Premiere Pro on your desktop. Go to the File menu, navigate to New, then choose the Sequence option. Drag the video file to the timeline and use the Razor tool to cut the parts you want to remove. Preview or edit the video further, then click the Export button to save the file.
-
Can I trim large videos without losing the quality?
Yes. However, it is recommended to use high-grade software to avoid major quality loss in video trimming. In this case, we suggest using Video Converter Ultimate or Adobe Premiere Pro to handle professional video trimming on Windows.
-
What are the cons of trimming videos on Windows?
Trimming can lead to re-encoding the video, which has potential quality loss. It is also prone to accidental deletion of clips that you want to keep on the project. On the other hand, you might pick a video trimmer that has a learning curve in which you have to spend precious time learning the navigation.
Conclusion
Thankfully, you have discovered how to trim videos on Windows with several tools. But more than that, you can effectively trim video clips with Video Converter Ultimate, as it offers user-friendly trimming with creating segment options. It is better to use a professional video editor that can also do other editing, such as converting, compressing, merging, and more. You can get the free trial version on Windows and Mac from the official website.
More from Blu-ray Master

