Have you ever watched a video in VLC only to discover that the audio is out of sync? Using VLC’s notable features, it provides a plethora of options for permanently repairing the delayed audio on your desktop. This post discusses several methods for resolving audio sync issues in VLC on Windows, Mac, and Android devices. Discover also the most laudable tool to fix your VLC audio delay problems.
Part 1. Why Does Audio Go Out of Sync in VLC
If you continue to receive this error, it is likely not due to VLC but rather to a Windows driver. It is, therefore, necessary to update both your video and audio drivers to resolve the issue. To do so, visit the manufacturer’s official website and install the most recent version of those drivers, which you should then install on your computer. Probably soon, this will resolve the situation for you.
Part 2. Fixes to Solve VLC Audio Delay Issues
These are three ways to resolve Audio Delay in VLC Media Player.
1 Repair the Audio Delay Issue by Audio Desynchronization Compensation
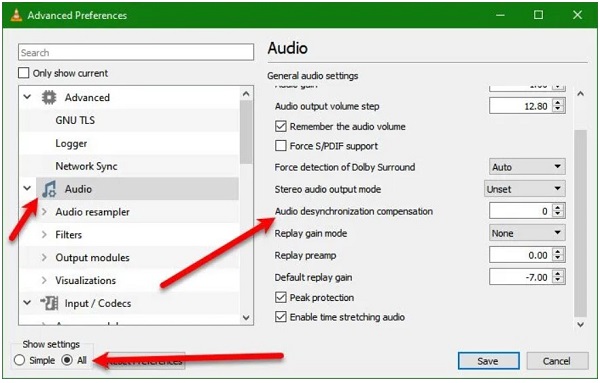
Use the Audio Desynchronization Compensation feature to fix the delayed audio issue. It would permanently correct the audio-video sync issue in VLC Player. Using this, the value only needs to be set once during the recording process. The settings are saved for all of the videos until you decide to change them once more. Here are the steps to fix desynchronized video and audio with VLC.
Step 1.Launch VLC Media Player. Select Tools > Preferences on the menu bar.
Step 2.Next, hit the Audio tab. Check in All options on the Show Settings.
Step 3.Audio desynchronization compensation can be found in the Audio section of the right pane. If the audio lags behind the video, change the value to a positive value. Set the value to a negative number if the audio starts before the video.
Step 4.When the audio and video are synchronized perfectly, hit the Save button.
2 Fix the Delayed Audio Using the Audio Track Synchronization
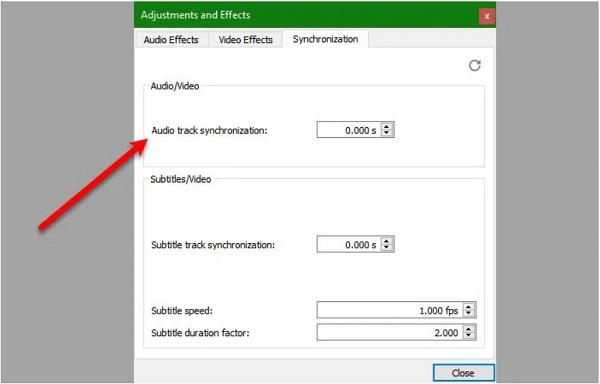
Change the Audio Desynchronization Compensation to see if it helps. If that doesn’t work, try changing the Audio Track Synchronization. It will take care of the problem for you. Steps for changing Audio Track Synchronization in VLC Media Player can be found in the following list of methods to fix VLC audio out of sync.
Step 1.Run the VLC Media Player. Hit Tools > Effects and Filters.
Step 2.Next, navigate the Synchronization tab. Change the Audio Track Synchronization from the Audio/Video section..
Step 3.Lastly, hit the OK button.
3 Adjust the Audio Delay in VLC using Keyboard Shortcut Keys
It is the quickest way to fix the VLC audio delay, but it is only temporary. Occasionally, the problem with Audio Delay is only transitory, and we must use a quick fix to get it back on track. As a result, if the audio begins just before the video, you must press K on a Windows computer or G on a Mac. On the other hand, if the video starts just before audio, you must press J on a Windows computer or F on Mac.
Part 3. Fixes Didn’t Work, The Best Way to Fix Desynchronized Video and Audio
If the issue persists after trying all the immediate fixes on how to delay audio in VLC, you can utilize the Video Converter Ultimate. Using this tool, you will not have a hard time changing the audio and video out of sync because of its easy-to-use interface and its commendable features. Apart from that, there will be no problems with the computer’s suitability because it is pretty equipped to work with Windows and Mac operating systems. It allows you to edit and modify your out-of-sync audio and video while saving time because it is equipped with a 70x faster conversion system. With so much anticipation, follow the steps below and fix the delayed audio using Video Converter Ultimate.
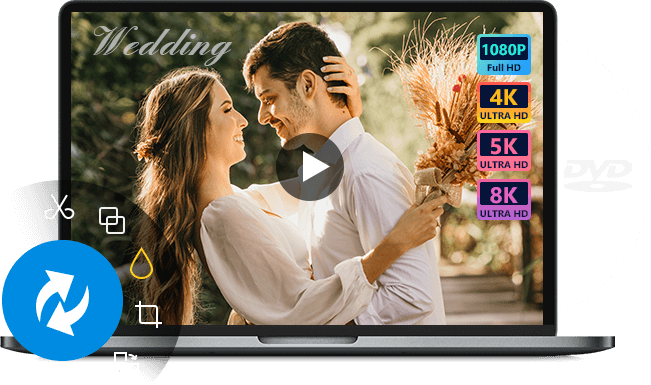
- Use as a video player, video compressor, and GIF maker.
- Your treasured files can be edited, trimmed, cropped, split, modified, compressed, enhanced, and more.
- Create your music video using your photos, video, and music on your gallery.
Free Download
For Windows
Secure Download
Free Download
for macOS
Secure Download
Step 1. Launch the program
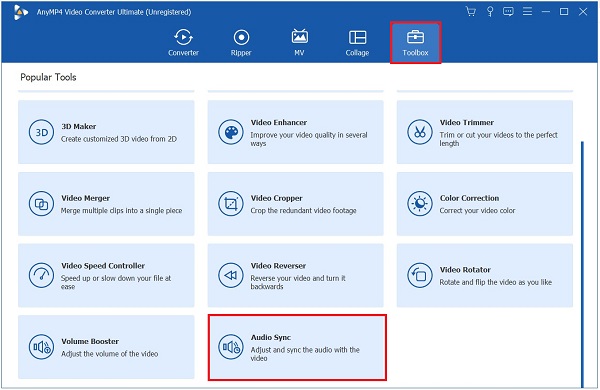
To get started, download the tool by visiting the official page of Video Converter Ultimate. Install and launch the program on your desktop. Upon running the tool, hit Toolbox > Audio Sync.
Step 2. Add the media file
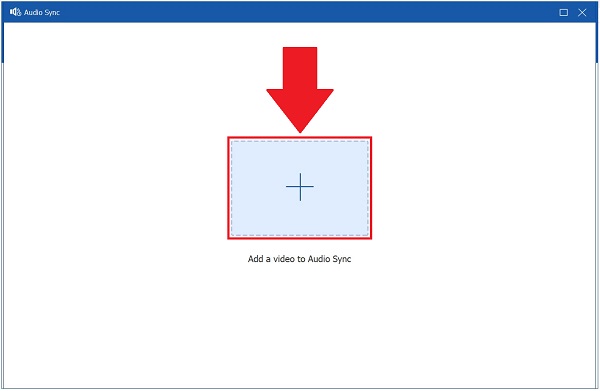
After that, import the media file by selecting the Plus (+) button in the middle of the interface. Otherwise, drop the media file at the center of the screen.
Step 3. Repair the audio out of sync
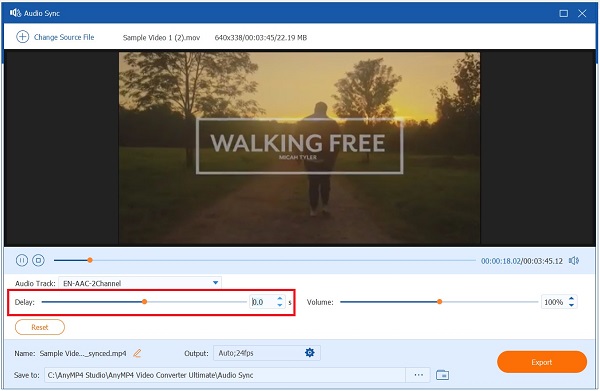
After importing the media file, it’s now time to repair the delayed audio. The audio delay can now be corrected by using the Delay Slider. Alter the audio delay as needed until the audio and video sync.
Note:
You can always refer to the Preview button to see if the audio and video sync.
Step 4. Modify the video settings
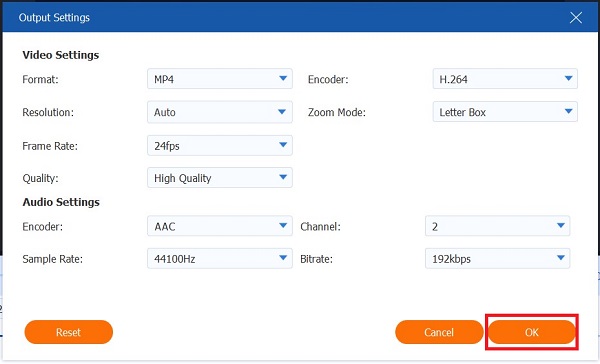
You can alter the video setting output, such as its resolution, framerate, and bitrate, when the audio and video are perfectly synchronized by selecting the Output Settings icon. To save the changes, hit the OK button.
Step 5. Please save the file to its file destination folder
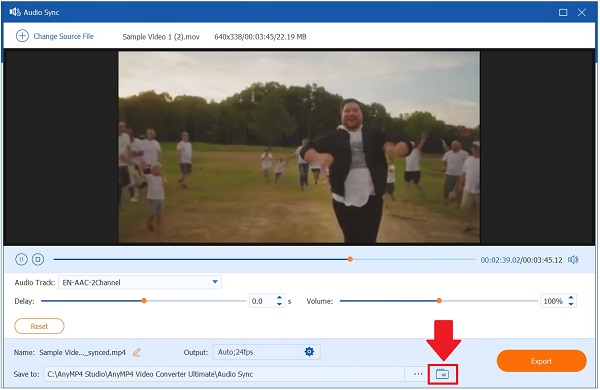
After that, save the media file on its designated file folder by hitting the Folder icon on the lower corner of the interface. Doing this will not have a hard time locating the file after exporting it.
Step 6.Export the file now
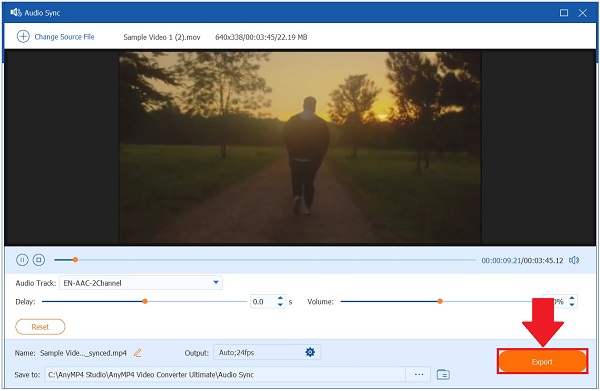
Once everything is set, you can now Export the newly synchronized media file. You can now share it on your social media accounts without worrying about the delayed audio.
Part 4. FAQs on VLC Audio Delay
-
1. What happened when I could not hear the audio of my video in VLC?
If there is an issue with the device selected in VLC Player’s sound preferences, you may not hear any sounds. To resolve this, initiate VLC and navigate to the Tools menu. Browse to Preferences and select Audio. Set the Output module option to Automatic using the dropdown menu.
-
2. Why can VLC only play audio but not video?
If the VLC still plays without video, the issue could be caused by an incompatible video codec in the files. In this situation, you may need to transform the file to a VLC-compatible video format. You can use Video Converter Ultimate to convert your files to a format accepted by the VLC Media Player.
-
3. How do I use VLC to download English Audio?
To do so, launch VLC, navigate to Tools > Preferences. And then click the Audio button. You’ll notice a section called Tracks at the lowest part of this window, as well as a text box labeled Preferred audio language within it. You should enter ENG> to download the English Audio.
-
4. How to adjust the audio delay in VLC using Android?
To fix the audio delay on Android, you need to run the VLC first. Next, hit the second icon at the bottom from the interface controls. Select Audio delay from the options. Click the add (+) or minus (-) button to increase or decrease the speed of the audio. Continue pressing the buttons until the audio and video are synchronized.
Conclusion
That’s all there is to it! With this enough knowledge, you will be able to determine why there is delayed audio in VLC, what steps you can take to correct the audio delay in VLC, and the best solution to use if none of the fixes are successful. Video Converter Ultimate got you covered. This software has an easy-to-use interface that makes editing your delayed audio a quick and straightforward process. Give this tool a try and download it on your desktop.
More from Blu-ray Master


