A Macbook consists of different features to help you finish digital work. One of its prominent functions is to record audio, but it is available in different apps. With that, you are about to learn how to record audio on Mac using built-ins like Voice Memos, QuickTime Player, etc. We also include popular and effective software as audio recording alternatives. With that said, let’s get started.
- Part 1. Use Voice Memos to Record Voice on Mac
- Part 2. Record Sound on Mac with Screen Recorder
- Part 3. Use QuickTime as an Audio Recorder on a Mac
- Part 4. GarageBand as Voice Recording Software on Mac
- Part 5. Recording Audio on Macbook Using Audacity
- Part 6. How to Choose a Mac Audio Recorder
- Part 7. FAQs
| Tools | Audio Format Supported | Internal Recording | External Recording | In sync with Other Devices | Editing Features | Sound Enhancement |
| Voice Memos | M4A, WAV | Yes | Yes | Yes | Yes | Yes |
| Screen Recorder | MP3, FLAC, M4A, WAV, etc. | Yes | Yes | Yes | Yes | Yes |
| QuickTime Player | M4A, WAV | No | Yes | Yes | Yes | No |
| GarageBand | WAV, M4A, etc | Yes | Yes | Yes | Yes | Yes |
| Audacity | MP3, WAV, etc. | Yes | Yes | No | Yes | Yes |
Part 1. Use Voice Memos to Record Voice on Mac
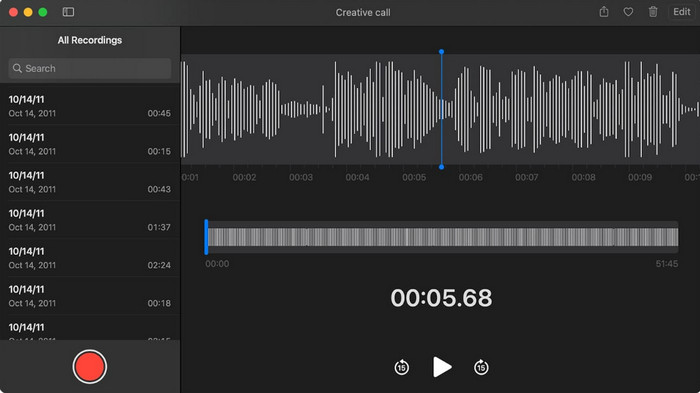
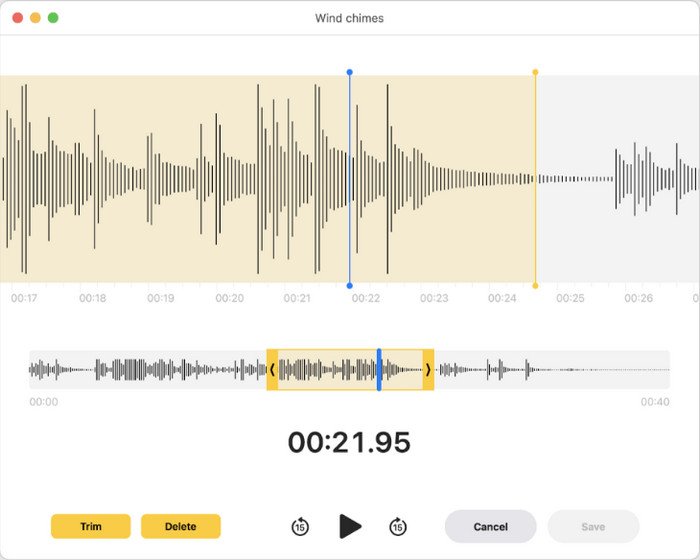
Voice Memos is the native audio recorder used in most Apple products. On Mac, it offers a sleek interface where you can start a recording in just one click. Although it is a recorder, Voice Memos also provides transcription, so you can read and search audio by text. Furthermore, it has editing features, including replacing parts of a recording, trimming, and adjusting the playback speed.
Step 1.Open the Voice Memos app on Mac and click the Record button to start. Begin the activity you want to capture. Then, click the Done button once you are done recording.
Step 2.Select the recording from the list, then go to the Edit menu. Here, you can rename or trim the audio file. Save the changes and share the file with your friends.
Part 2. Record Sound on Mac with Screen Recorder
Most built-ins on Mac do not offer internal recording, so it is better to use Blu-ray Master Screen Recorder. It is a high-quality recorder that captures different content on your computer, such as audio, video, gameplay, online meetings, and others. When it comes to audio, it allows you to capture external and internal separately or simultaneously without overlapping sound. Its output settings are ideal for further configuration, especially if you want to set the output format, codec, quality, and sample rate before recording. On top of that, you don’t have to download other recording tools because the Blu-ray Master Screen Recorder has it all!
● User-friendly and effective for audio recording.
● Export audio in MP3, WAV, ALAC, FLAC, etc.
● Access recording controls via shortcut keys.
● Suitable for professional recording, like producing songs.
Step 1.Download and install Screen Recorder on your Mac.
Free Download
For Windows
Secure Download
Free Download
for macOS
Secure Download
Once it is running, open the dropdown menu from the upper left and choose the Audio Recorder option.

Step 2.Next, set up the system audio to capture internal audio or a microphone for external audio. Click the Test button to test the connected devices. Click the REC button to begin recording. A small widget will appear, including recording controls and the length of the audio.

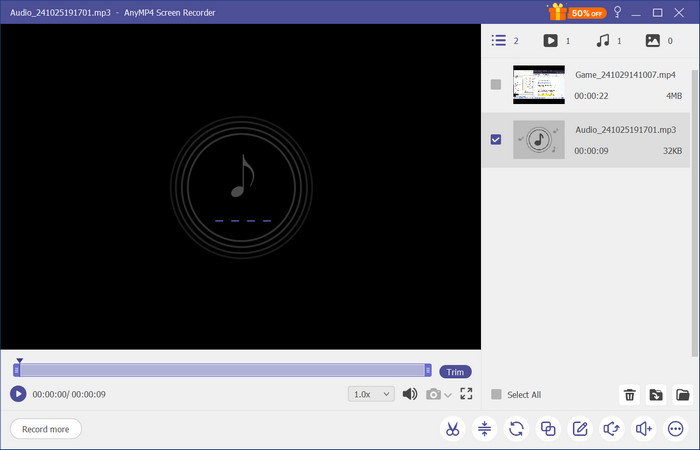
Step 3.When you stop the audio recording, the program will show you a preview window where you can play and trim the file. Other than that, you also have the option to import the file to a different location or share it on your socials.
Part 3. Use QuickTime as an Audio Recorder on a Mac
QuickTime is often associated with video playback since it is the native Mac media player. However, it has additional features like the audio recorder. It is a simple tool that allows you to capture external audio using a microphone. It also lets you save recordings in different formats, mostly M4A and WAV. Moreover, you don’t need to download software to record audio, as QuickTime does not require it. QuickTime Player is available on any Mac OS version, so it is really helpful for a simple audio recording on your computer.
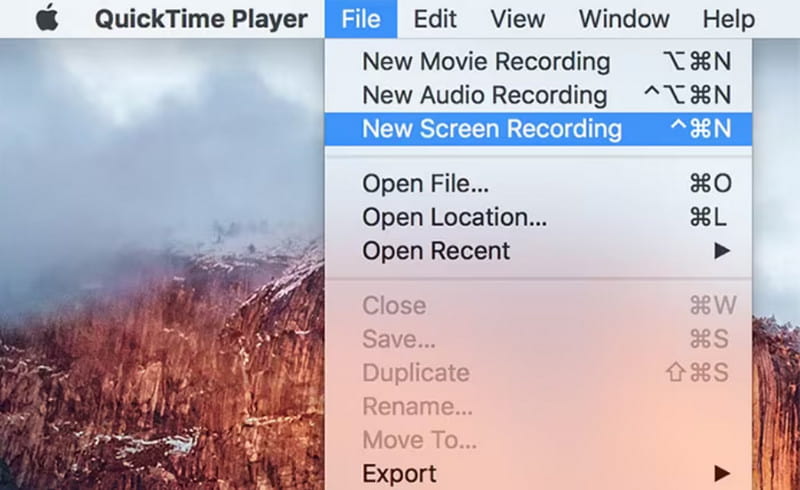
Step 1.Start by opening QuickTime Player on your computer. Access the File menu and choose the New Audio Recording option.
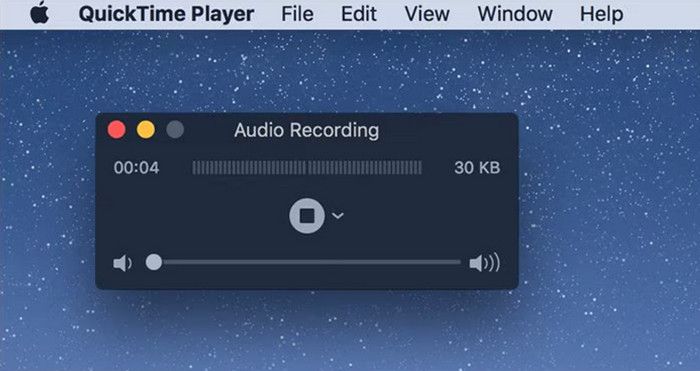
Step 2.From the Options, you can select the desired microphone and recording quality. Once you are ready, click the Record button to begin the recording. Go to File again and click Save to export the audio file.
Part 4. GarageBand as Voice Recording Software on Mac
GarageBand is equipped with the best audio recording and editing tools for Mac. The software offers advanced recording with digital instruments to add to the audio, including string instruments and percussions. It also has an enhancement, which helps to remove background noise from the recording. GarageBand is pre-installed on most Macbooks, making it accessible for audio recording anytime.
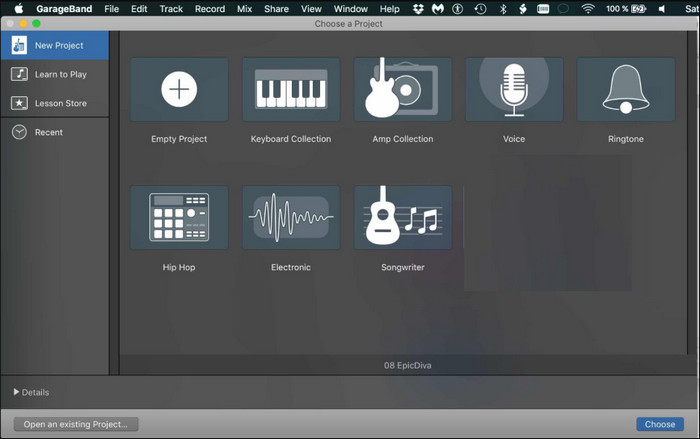
Step 1.Open GarageBand on Mac and click the New Project button to create one. You will need to choose the Empty Project template to proceed. Then, select the track type and verify the input settings.
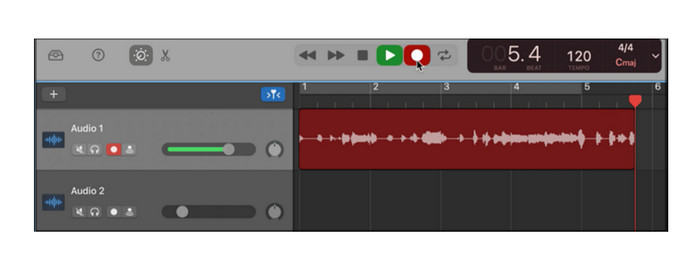
Step 2.You can customize or simplify the interface by closing the extra windows. Click Record and speak to the mic. Press the spacebar to end the recording. Then, listen or edit the audio using the built-in features.
Part 5. Recording Audio on Macbook Using Audacity
Audacity is one of the best audio recording software for Mac, Windows, and Linux. It is free to use and has lots of advanced features. It includes external and internal audio recordings to capture online sounds and your voice. On top of that, it is also equipped with essential editing functions, allowing you to trim, merge, and compress audio in Audacity . The tool is a bit comprehensive, but it has an active community where you can learn more about its system.
Step 1.Download and install Audacity on your Mac. Connect your interface and ensure the Core Audio is selected and the connected interface is set as the input and output. Then, you can choose (Mono) Recording Channels to record with the mic.
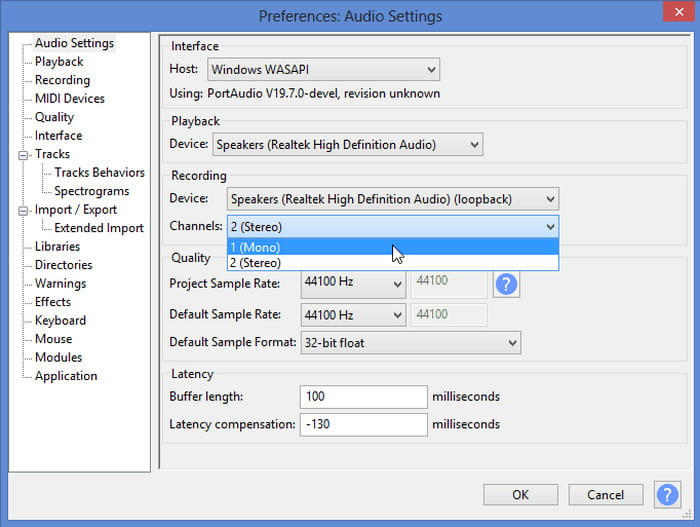
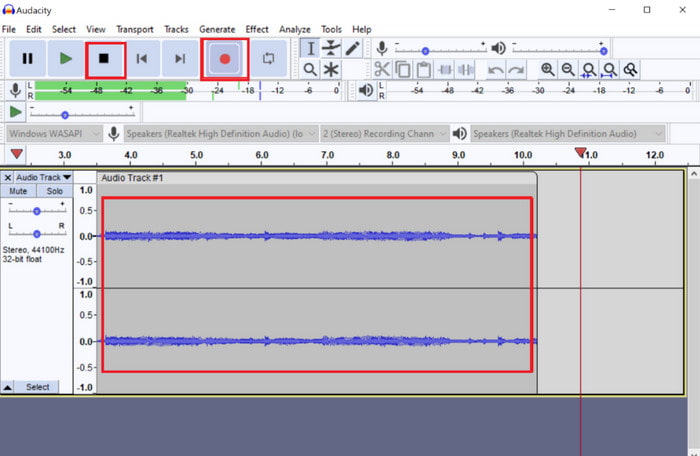
Step 2.Download and install Audacity on your Mac. Connect your interface and ensure the Core Audio is selected and the connected interface is set as the input and output. Then, you can choose (Mono) Recording Channels to record with the mic.
Part 6. How to Choose a Mac Audio Recorder
There are many options for an audio recorder on a Mac, but it takes time to go through all of them to find the one suitable for you. Fortunately, you can avoid the hassle by considering your specific needs, especially if you are looking for a free audio recorder that is easy to use and produces high-quality recordings. Other than that, consider a tool that offers output configuration to ensure that your recording has a good result. Remember, most free audio recorders on Mac are only for beginners, so you may still need advanced software to get professional-quality audio.
Part 7. FAQs
-
Which tool is the best for recording external audio on a Mac?
QuickTime Player allows you to capture external audio. Just make sure to plug in a compatible microphone. Then, go to the Options menu to set the external mic as the Input.
-
What audio formats are used for my audio recordings on Mac?
Macs always save audio files in M4A, an audio file format that balances file size and quality. However, depending on the audio recording software, you can still choose other file formats, such as AIFF, WAV, and MP3.
-
How to share audio recordings from Mac to iPhone?
The quickest route is to upload the audio recordings to your iCloud Drive since you can access the files between your Apple devices. Alternatively, AirDropping is also a good method because you only need to connect the devices to the same WiFi network.
Conclusion
How do you record audio on a Mac? The free tools make capturing external and internal audio on your computer easier. Of course, some built-ins are accessible but do not offer audio editing, so it is better to try Screen Recorder by Blu-ray Master. Not only is it easy to navigate, but its output settings are configurable and reliable for high-quality audio. Try the free version by clicking the Free Download button.
More from Blu-ray Master

