This article will share the introduction of one of the most popular screen recorder application, DU Screen Recorder. Today, recording something on your desktop or screen is not a difficult task. The built-in features let you do it on Windows 10, Mac OS X/11, Android 10 and iPhone simply. However, they are too simple to take screen recordings as professionals. That is why you need a more powerful tool. Read this post so that you can find whether DU Screen Recorder is worth you to use.

Part 1. Brief Review of DU Screen Recorder

DU Screen Recorder, also called DU Recorder, is a useful tool to capture everything on your screen. The developer released an app for both iOS and Android. Moreover, it offers the desktop software for computers recently. Let’s see the features of DU Screen Recorder:
- Record screen, gameplay and video with audio.
- Live stream your screen to YouTube, Twitch and Facebook.
- Produce high quality recording videos.
- Offer a simple video editor to polish screen recordings.
- Offer a simple video editor to polish screen recordings.
- Convert screen recordings to GIF animated images.
- Available to Windows XP/Vista/7/8/8.1/10, Mac OS X/11, iPhone and Android.
Brief Review of DU Screen Recorder
Pros
- Du Recorder is able to record screen up to 60 FPS.
- Once you install the app, the virtual assistant will appear on any screen.
- The livestream feature is easy to use.
- It is free to download and use the basic features.
Cons
- You have to view annoying ads to exchange features for free.
- It will add watermark to your screen recordings.
- To get rid of ads, watermark or get full features, you have to pay for it.
Part 2. How to Use DU Screen Recorder
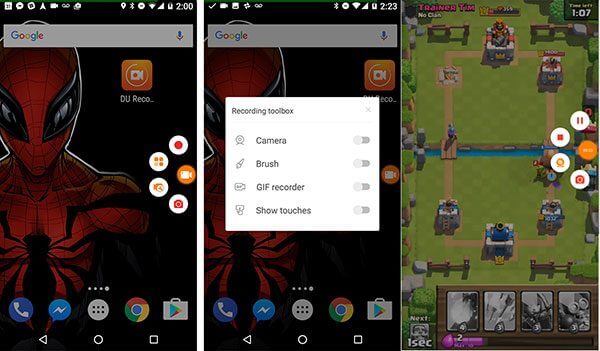
How to Use DU Screen Recorder on iPhone and Android
How to Use DU Screen Recorder on iPhone and Android

Step 1.Install DU Screen Recorder from App Store or PlayStore. It is free to download.
Step 2.Then you will find a virtual assistant button on your Android Screen. For iPhone, it will be integrated in Control Center. You can set video quality, and other options in the app.
Step 3.Enter the screen you want to record, like a video game. Tap the virtual assistant on Android, and touch the Record button. On iPhone, go to Control Center, tap the screen recording icon, choose DU Recorder.
Step 4.After recording, tap the virtual assistant and press the Stop icon on Android. For iPhone, go to Control Center, tap the screen recording icon and hit Stop Recording.
How to Use DU Recorder for PC
Step 1.Install DU Recorder to your computer. You can download the installer file from the official website.

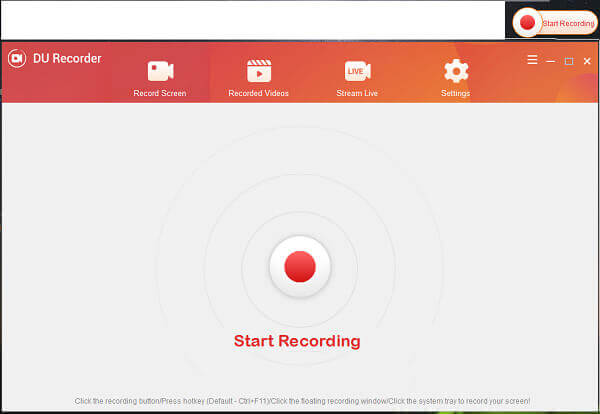
Step 2.Once you are ready to record your screen, open the user interface, choose Record Screen and click the Start Recording button at upper right corner.
Step 3.When you want to stop the recording, click the Stop Recording button and save it to a proper location.
Note: In the past, an emulator is necessary to use DU Recorder on PC. Now, you can download the exe file and install it directly.
Part 3. Best Alternative to DU Screen Recorder on PC
It cannot be denied that DU Recorder is a powerful tool, but it is not perfect. The watermark, for example, is difficult to remove. Moreover, it takes a while to render recordings. If you do not like it, Blu-ray Master Screen Recorder is a good alternative.
Main Features of the Best Alternative to DU Recorder for PC
- Record screen in a single takes with no watermark.
- Record everything on your screen and external device.
- Optimize and enhance recording quality automatically.
Free Download
For Windows
Secure Download
Free Download
for macOS
Secure Download
Briefly speaking, it is the easiest way to record your gameplay, video tutorial, and more on your desktop.
How to Record Screen on PC without Watermark
Step 1.Install Screen Recorder
Launch the best alternative to DU Recorder for PC once you install it. There is a dedicated version for Mac. Then pick Video Recorder to access the main interface. If you wish to customize options, like output format, video quality, hotkeys, and more, click the Gear icon to open the Preferences dialog.

Step 2. Record screen with no watermark
You can see four options in the main interface:
- Display, record screen and let you select the recording area.
- Webcam, add your face to screen recording.
- System Sound, record audio from yoursystem.
- Microphone, capture your voice viamicrophone.
You can decide to turn on or off each option based on your need. Click the REC button to start recording screen with no watermark.

Step 3.Edit and save recording
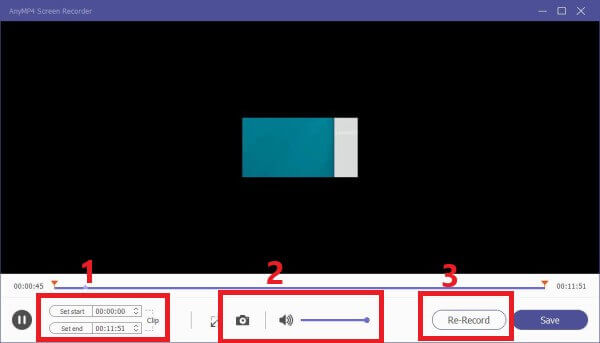
When you are done screen recording, click the Stop button. Then preview and edit the recording video. If you are satisfied with it, click Save button to save it to your hard drive.

Part 4. FAQs about DU Screen Recorder
-
Is DU Screen Recorder safe?
Yes, it is safe to use DU Screen Recorder. If you are worried aboutthe safety of the application, try an alternative directly.
-
How long can DU Recorder record?
DU Recorder has no limit on recording length in both free and paid versions. It usually depends on the space left on your mobile device or hard disk.
-
Can Snapchat detect DU Recorder?
No, Snapchat cannot detect third-party screen recording apps, like DU Recorder. It can only detect whether others screenshot your snaps with shortcuts or built-in operating system screenshot software.
Wrapping up
This article has talked about one of the most popular screen recording apps, DU Screen Recorder . It lets you record screen on iPhone, Android and Windows and Mac. Though the livestream feature is not stable, it works for YouTube, Twitch and Facebook. Of course, it is not the only way to record your screen. Blu-ray Master Screen Recorder, for example, allows you to do it easily. Unlike DU Recorder, the alternative won’t add watermark to your recordings. More questions? Please write them down below.

