Do you want to edit videos from physical DVD copies? The good thing is your Mac has a default video editor to professionally trim, add effects, and do overall editing for free. But can you import a DVD into iMovie? While it is not easy to achieve this task, this article will guide you to successfully import the DVD content to the Mac’s default video editor. Let’s continue reading to see the demonstrations.
Part 1. Can You Import a DVD into iMovie
iMovie on Mac is able to allow users to import VOB files from homemade DVDs. However, there is a lingering drawback with this: the lack of native support for commercial DVDs. This means that you can only import videos you have burned on discs, while movies that are released from cinemas are unsupported.
As obvious as it is, for you to import DVDs on your video editor, you must convert and change the file extensions into supported ones. Here are some natively supported formats on your Mac computer:
Video: MP4, MOV, M4V, VOB, 3GP, AVI
Audio: AAC, AIFF, MP3, WAV, CAF
But remember that these formats must contain uncompressed codecs for you to be able to import DVDs into iMovie. Or else the video editor will not recognize it. Now, if you have homemade DVDs, it is easy to turn them into VOB files and import them to iMovie. Here’s how:
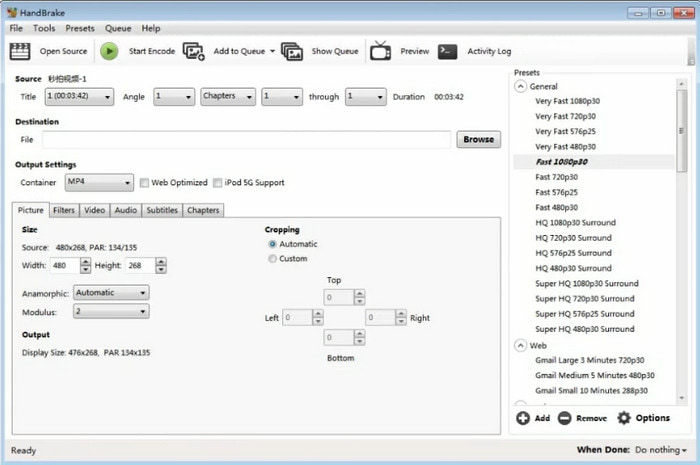
Step 1.You may use HandBrake to convert the DVD into iMovie or VOB. Make sure to download the software from the official website and then install it.
Step 2.Load the disc and allow the program to detect it. Import the videos and choose VOB as the output format. Hit the Start button to process and convert the DVD to VOB.
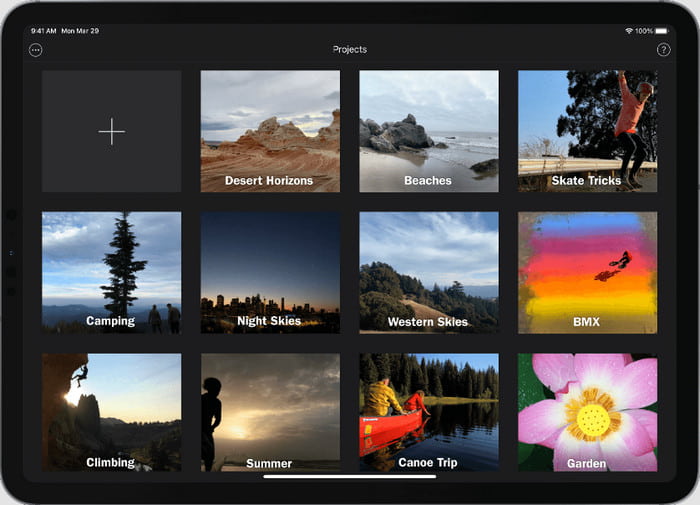
Step 3.Once the files are converted, open iMovie on your Mac. Click the Create New button to start a new project. Browse your local folder and find the converted videos. From there, copy the DVD videos into iMovie and drag them to the timeline below to start editing or watching.
Part 2. How to Rip DVD to iMovie-Supported Digital Formats
While HandBrake can rip DVDs, it is still insufficient for a high-quality conversion. So, we encourage you to use AnyMP4 DVD Ripper as it has the power to rip homemade and commercial DVDs on Windows and Mac.
The desktop tool consists of advanced technology to extract content from physical DVD copies without lowering the quality. Of course, it converts the videos into other containers, allowing you to change them to VOB, MKV, MP4, and so on. Although you can import DVDs to iMovie for video editing, you might as well use the DVD Ripper’s built-in video editor to add text, cut unwanted parts, and further enhance the overall visual. Download DVD Ripper to start with the fastest ripping process.
- A DVD to iMovie converter and ripper on Windows and Mac.
- Convert videos to be compatible with OS like Apple, Android, etc.
- Support a wide range of output video/audio formats and codecs.
- User-friendly interface and effective functionality.
Free Download
For Windows
Secure Download
Free Download
for macOS
Secure Download
Step 1.To get a DVD into iMovie, download AnyMP4 DVD Ripper and install it on your computer. Load the disc to the optical drive, then click the Load Disc button from the software’s main interface. Wait until the program processes it.
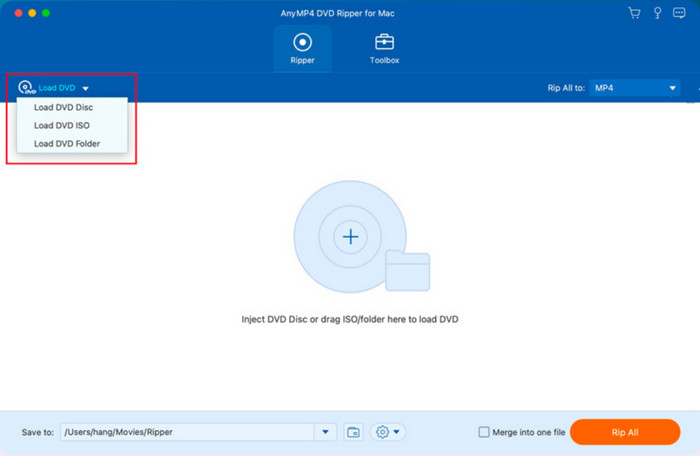
Step 2.Once the disc is successfully loaded, proceed to select the desired output formats. If you want to make the videos compatible with your Mac or any built-in app, go to the Profile menu and choose the MOV, MP4, or others.
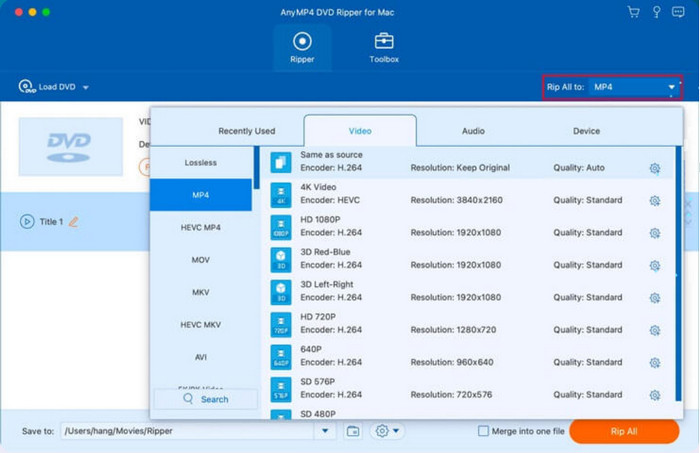
Step 3.Don’t forget to pick a location folder where you want to save the converted files. Then, hit the Rip All button and wait until the conversion is done. After that, you can play and edit the videos unrestricted.
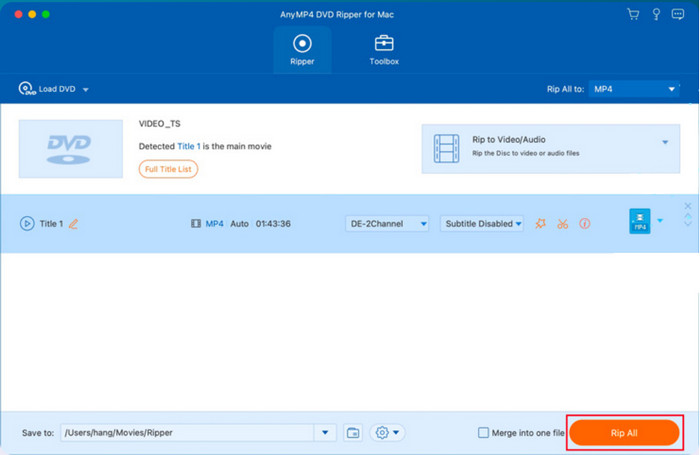
And there you have it! AnyMP4 DVD Ripper is made to rip and convert the DVDs you want to import to iMovie. The process is easier with excellent output quality.
Part 3. How to Import a Ripped DVD into iMovie
Once you have done the last part’s demonstration and the ripped DVDs are ready, it is time to import them to the iMovie app:
Step 1.Open iMovie on your computer and navigate to the My Media panel from the sidebar. Click the Import Media button and pick the ripped DVD files from your local folder.
Step 2.Once the videos are loaded on the window, drag and drop one to the timeline at the bottom part of the interface. Proceed to edit the clips, such as cutting, trimming, adding effects, etc. Click the Play button to see a preview of the edited video. Then, export the video from iMovie as the format you want to save.

Part 4. FAQs about Importing DVDs into iMovie
-
Can I play a DVD on my Mac?
Yes, you can. As long as you have an optical drive like an Apple USB SuperDrive, streaming videos and songs from DVDs is easy. This method is also excellent for accessing files that are backed up from a CD.
-
Can I burn a DVD in iMovie?
Unfortunately, this app does not have a function that allows you to burn a DVD with iMovie. It is only possible to burn a DVD on your Mac with the help of a professional DVD burner tool, and then you can use iMovie to remove unwanted parts or improve the video quality of all the clips you want to burn.
-
Is iMovie still available for Mac?
Yes. It is a video editor for Apple devices designed to give users free video editing tools. iMovie continues to be part of every OS version, so it is unlikely to get removed by the developers. But if you don’t find the video editor on your Mac, you can download and install it from the App Store, then just sign in with your Apple ID and password.
Wrapping up
In conclusion, it is not possible to directly import DVDs on the video editor. However, you have learned how to put a DVD into iMovie, and it is done by ripping and converting the extracted files. With the help of this post, you can use iMovie to edit and watch the videos, but we also urge you to use DVD Ripper to preserve the high-quality content. Check the free version and discover a professional DVD-ripping software for Mac and Windows.
More from Blu-ray Master


