
May 20, 2024 11: 00Actualizado por Brittany García a Crear DVD
Do you want to collect various videos and preserve them by burning them on a DVD using a Mac? In that case, we are glad that you are in the right place. In this guidepost, we will give detailed instructions on how to grabar DVD en una Mac using the two most popular and effective programs you can use. With that, you have more options on what tool to use to achieve your goal. Without further ado, begin reading this whole content and learn everything about the methods to follow for burning DVDs on a Mac.

Parte 1. Why Doesn’t Mac Come with Optical Drives anymore
Well, there are various reasons and considerations why Mac doesn’t offer an optical drive. As we all know, in this modern world, technologies, especially devices, are always updating and upgrading. In terms of using optical drives, there are various alternatives you can use, which are more convenient and affordable. With that in mind, there is no doubt that for some users, there is no need to use an optical drive. But if you want to learn more reasons why Apple removed the optical drive on Mac, see the details below.
Shift Towards Digital Media
Nowadays, we can notice that there are various streaming services you can find online. It includes Apple Music, Apple TV, and other helpful applications, like iTunes. It makes it easier to access various movies and music since all you need is to search for your preferred content. With the help of these streaming services, you may conclude that you don’t have to use an optical drive to have effective video and audio playback. Aside from that, there is also a software distribution. Since the App Store is developing, most software is now installed electronically. With that, you don’t have to need any physical installation disc on your Mac.
Funcionalidad y Diseño
When thinking about optical drives, we can think of hardware that is thick and heavyweight. It is the reason why Apple removed it on Mac. Apple prefers lightweight and thin designs for its Mac. With that, it is necessary to remove the drive. In addition to that, Apple prioritizes internal space. Without the optical drive, Apple can insert other components, such as a powerful processor and a larger battery.
More Convenient Optical Drive Alternative
Well, there are various external drives you can use instead of optical drives. The best example is a flash drive. It is among the external drives that you can insert and connect on your Mac when needed. With this, you can keep your files, such as movies, audio, documents, and more. Also, since we are now in a modern era, there is digital storage you can use, which is called Cloud storage. With this, you don’t have to use any physical drives for storing different contents.
Parte 2. Best Way on How to Burn A DVD on Mac
If you still want to burn a DVD on a Mac using the most effective and efficient way, then you can use DVD Creator. After downloading this offline program on your Mac, you can already begin with the DVD-burning procedure. Well, based on our hands-on experience, we can tell that you can easily utilize the program. It is because DVD Creator has a simple layout that makes it more understandable to all users. Also, its burning process is fast, so you don’t have to consume more time during the process. Aside from that, there are various functions you can enjoy while burning DVDs. The program can offer ready-to-use menu templates with various themes. It includes Christmas, Family, Wedding, Travel, and more.
Plus, you can also add background music and an opening film. What’s more, you can even use the Audio Edit function. With this, you can edit the volume, and the delays and use various languages. You can even edit the video to enhance your file. You can add effects, change video color, crop, clip, and add a watermark. With all of that, we can conclude that is among the best programs you can operate to burn DVDs smoothly. So, you can follow the simple instructions below and learn how to burn a DVD on a Mac.
Paso 1.First and foremost, go to the main website of DVD Creator and hit the Free Download button. Ensure that a blank DVD is already inserted on your device.
Descargar gratis
Para ventanas
Descarga segura
Descargar gratis
para macOS
Descarga segura
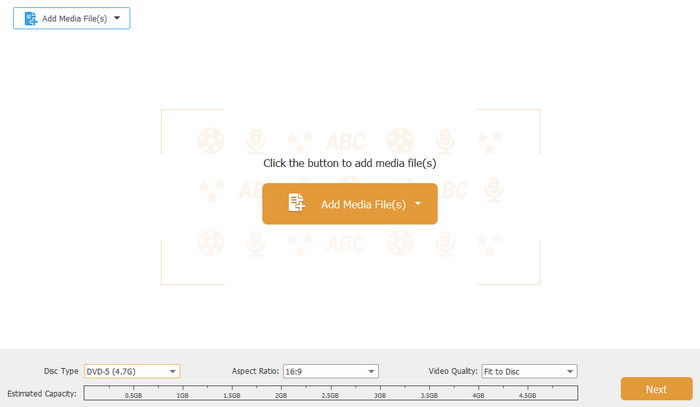
Paso 2.Then, from the main user interface, click Add Files to see the computer file folder. After that, choose the file that you want to burn and click OK.
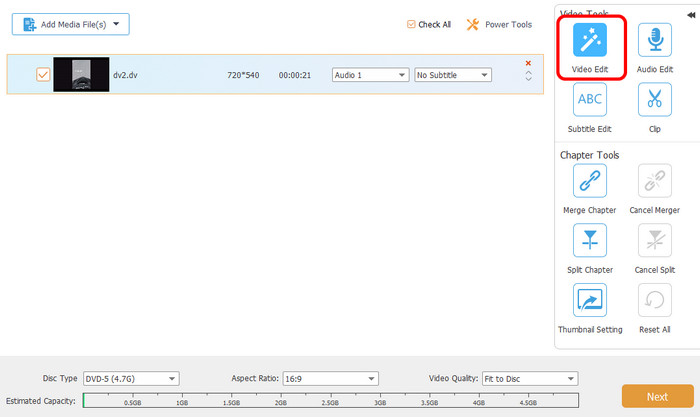
Paso 3.If you insert a video file, you can enhance it using the Video Edit function. In this function, you can recortar el video, rotate, add effects, change the video color, and more. Once done, click Apply > Next option.
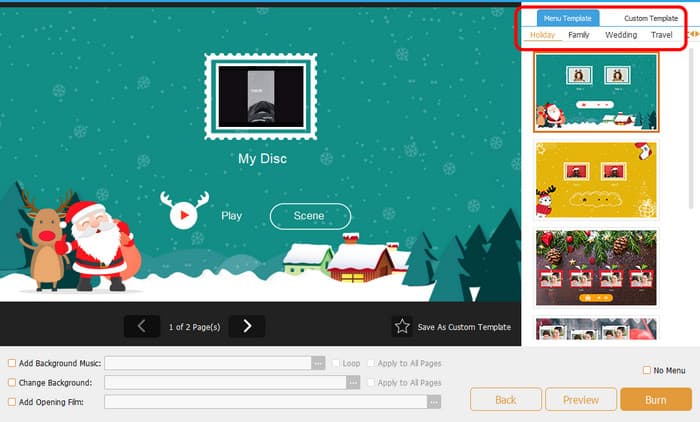
Paso 4.After that, you can also add a menu template to your file. There are various templates you can use for free, so choose your preferred templates.
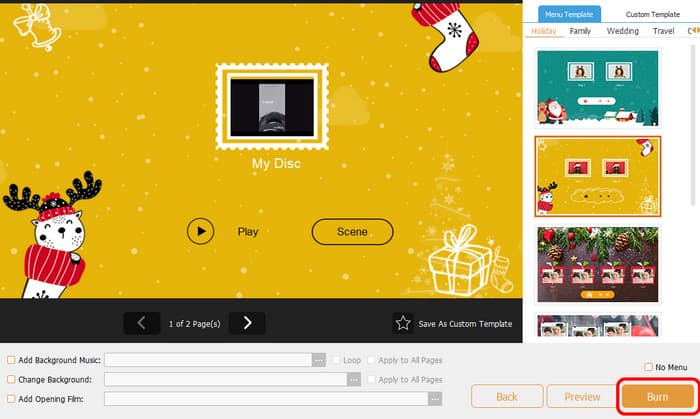
Paso 5.Once you are done with everything, you can hit the Burn button below. Then, wait for a few seconds to get the outcome.
Parte 3. How to Create DVDs on Mac Using iDVD
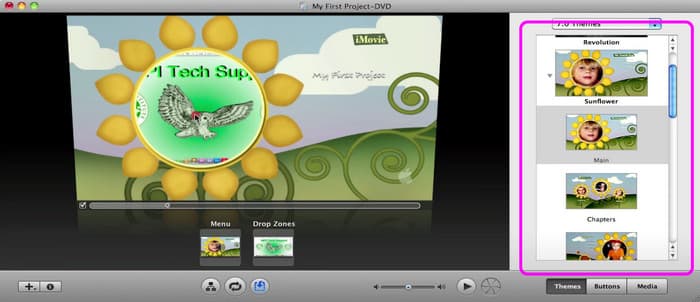
Another helpful program that may help you burn DVDs on a Mac is iDVD. Using this DVD-burning software, you can make a DVD in just a few minutes. Also, since its core feature is to burn DVDs, you can use everything you need. It includes various templates or themes that can improve your files. You can also customize your menus by adding chapters, background images, music, titles, and more. In addition to that, iDVD comes with a collection of more than 150 pre-made themes crafted by Apple. These themes dictate the layout, text style, background imagery, and music for DVD menus and submenus. Plus, users have the flexibility to customize the fonts and incorporate text boxes. It can even adjust the appearance and placement of buttons.
But, even though the program is helpful, there is also a drawback you might encounter. Even though the interface is simple, it is still looking outdated, which users don’t like. It is best to deal with its interface to attract more users for burning DVDs. Lastly, the biggest disadvantage of this program is that iDVD is a discontinued Mac software created by Apple. So, you won’t get any updates about the program. You can follow the instructions below to learn how to burn DVDs on a Macbook or Mac.
Paso 1.Access the iDVD on your Mac. After that, launch it to begin the DVD-burning process.
Paso 2.After you launch the iDVD software, add the file that you want to burn. You can get all the files from your file folder.
Paso 3.Then, you can use various templates and themes on the right interface. Select your preferred interface and add some text to it.
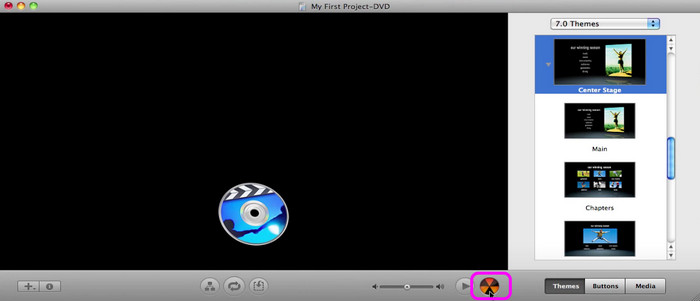
Paso 4.Once you are done with everything, you can begin with the DVD-burning princess by hitting the Burn button on the bottom interface. After a few seconds, you can already have your DVD.
Parte 4. FAQs about Burning DVDs on Mac
-
Can I burn a DVD on my Mac?
Definitely, yes. Burning a DVD on a Mac is simple. All you need is to download the DVD Creator. With this program, you can already burn DVDs without any hassle. After you run the program, add the media file that you want to burn. After that, you can even select various templates from the right interface. If you are done with everything you need, you can begin burning DVDs by clicking the Burn button.
-
Can I burn a DVD to an ISO on a Mac?
Absolutely, yes. To burn a DVD to an ISO file, install DVD Creator on your computer. After adding the file, go to the Next button. After that, proceed to the Burn button to see another interface. After that, check the box beside the Save as ISO section. Then, click Start to begin burning the DVD to an ISO file.
-
Can I burn a playable CD on my Mac?
Of course, yes. To burn a playable CD, you will need the help of the Music app, especially if you want to deal with music. First, you can create a playlist on the Music app. After that, click File > Burn Playlist to Disc. With that, you can already have your CD.
Terminando
A grabar DVD en Mac, you can read this review since we provided all the details you need, including the best software to use. Also, the post offered simple-to-follow instructions. With that, you can burn DVDs effectively. Plus, if you want to burn DVDs without any hassle, we recommend using DVD Creator. With this program, you can edit the file, add a menu template, and add an opening film, which can make your final output more amazing.
Más de Blu-ray Master
- Cómo grabar DVD en Windows y Mac: 3 tutoriales sencillos
- Los mejores métodos de 4 para convertir MP4 a DVD sin pérdida de calidad
- El mejor software de grabación de DVD de 10 en 2024 (incluidos los grabadores de DVD gratuitos de 9)
- Cómo grabar una película QuickTime en DVD en Mac y Windows
- Grabe perfectamente AVI en DVD utilizando los 3 mejores métodos sin conexión
- Grabe M4V en DVD utilizando las grabadoras de M4V a DVD de primera categoría